Background
I had try to build many of Go simple site, Like Golink, GProbe and so on.
But it's not secure enough, and very easy to be attacked.
At these days, I want to build a Pastebin website and its need with powerful Security.
Let's building
Its all old way like I posted before.
Goserve HTTP endpoints.- template to render HTML.
- SQLite3 to store and query data.
Endpoint design
For simply, I just make 2 endpoints for Pasty:
/: to get index page(GET) and create a new paste(POST)/paste/: to get paste page(GET) and delete it(DELETE)
This is the whole APIs I need to write.
Let's start:
http.HandleFunc("/", func(w http.ResponseWriter, r *http.Request) {
	if r.Method == "GET" {
		pastes := getAllPastes(db)
		tmpl.ExecuteTemplate(w, "index.html", pastes)
	} else {
		r.ParseForm()
		content := r.Form.Get("content")
		insertPaste(db, escapeContent(content))
		http.Redirect(w, r, "/", http.StatusSeeOther)
	}
})

http.HandleFunc("/paste/", func(w http.ResponseWriter, r *http.Request) {
	uid := r.URL.Path[len("/paste/"):]

	if r.Method == "GET" {
		paste := getPasteWithID(db, uid)
		if paste.isNil() {
			http.NotFound(w, r)
			return
		}
		tmpl.ExecuteTemplate(w, "paste.html", paste)
	} else {
		deletePaste(db, uid)
		http.Redirect(w, r, "/", http.StatusSeeOther)
	}
})
Then we need to write tmpl and implement CRUD(getAllPastes, getPasteWithID, insertPaste, deletePaste)
ORM
Actually, I'm a original-thinker, I don't like to use third-party packages.
But ORM will make program easier.
I use SQLite3 and Gorm to store and query data.
Gorm is easy to use, it provide a lot of functionality.
type Paste struct {
	ID        int       `gorm:"column:id"`
	UID       string    `gorm:"column:uid"`
	Content   string    `gorm:"column:content"`
	CreatedAt time.Time `gorm:"column:created_at"`
}

func getAllPastes(db *gorm.DB) []Paste {
	pastes := []Paste{}
	db.Find(&pastes)
	return pastes
}

func getPasteWithID(db *gorm.DB, uid string) Paste {
	paste := Paste{}
	db.First(&paste, "uid = ?", uid)
	return paste
}

func insertPaste(db *gorm.DB, content string) {
	paste := Paste{UID: uuid.New().String(), Content: content, CreatedAt: time.Now()}
	db.Create(&paste)
}

func deletePaste(db *gorm.DB, uid string) {
	db.Delete(&Paste{}, "uid = ?", uid)
}
There are all we need!
Oh.. maybe we need to init a database?
Right, It's also very easy to init databse, Gorm will help you.
func initDB(filepath string) *gorm.DB {
	db, err := gorm.Open(sqlite.Open(filepath), &gorm.Config{
		DisableAutomaticPing: true,
	})
	if err != nil {
		log.Fatal(err)
	}

	err = db.AutoMigrate(&Paste{})
	if err != nil {
		log.Fatal(err)
	}

	return db
}
We just need to open the database and migrate the table. If table not exist, it will create it. and if exist, it will do nothing.
Templates
I thought Template is very powerful when build simple website.
We just need to create 2 pages: index.html and paste.html.
<!DOCTYPE html>
<html>
<head>
    <title>Pasty</title>
</head>
<body>
    <h1>Pasty</h1>
    <p>Input your paste</p>
    <form method="POST">
        <textarea name="content" required rows="30"></textarea>
        <br/>
        <input type="submit" value="Submit">
    </form>
    <hr/>
    <h2>Pasted</h2>
    {{range .}}
        <div>
            <a href="/paste/{{.UID}}">{{.UID}}</a>
            <p><pre><code>{{truncate .Content 200}}</code></pre></p>
        </div>
    {{end}}
</body>
</html>
<!DOCTYPE html>
<html>

<head>
    <title>Paste</title>
</head>

<body>
    <h1>Paste</h1>
    <a href="/">Home</a>
    <div>
        <h2>{{.UID}}</h2>
        <pre><code>{{.Content}}</code></pre>
        <p>{{.CreatedAt}}</p>
        <form method="POST">
            <input type="submit" value="Delete">
        </form>
    </div>
</body>

</html>
CSS is the hardest part I thoguht when I write any website. So I use water.css for styling.
Water.cssis a drop-in collection of CSS styles to make simple websites like this just a little bit nicer.https://watercss.kognise.dev/
You just need to import water.css to html file, and you will got a pretty website with auto dark mode.
Add this to head element.
<link rel="stylesheet" href="https://cdn.jsdelivr.net/npm/water.css@2/out/water.css">
Run it!

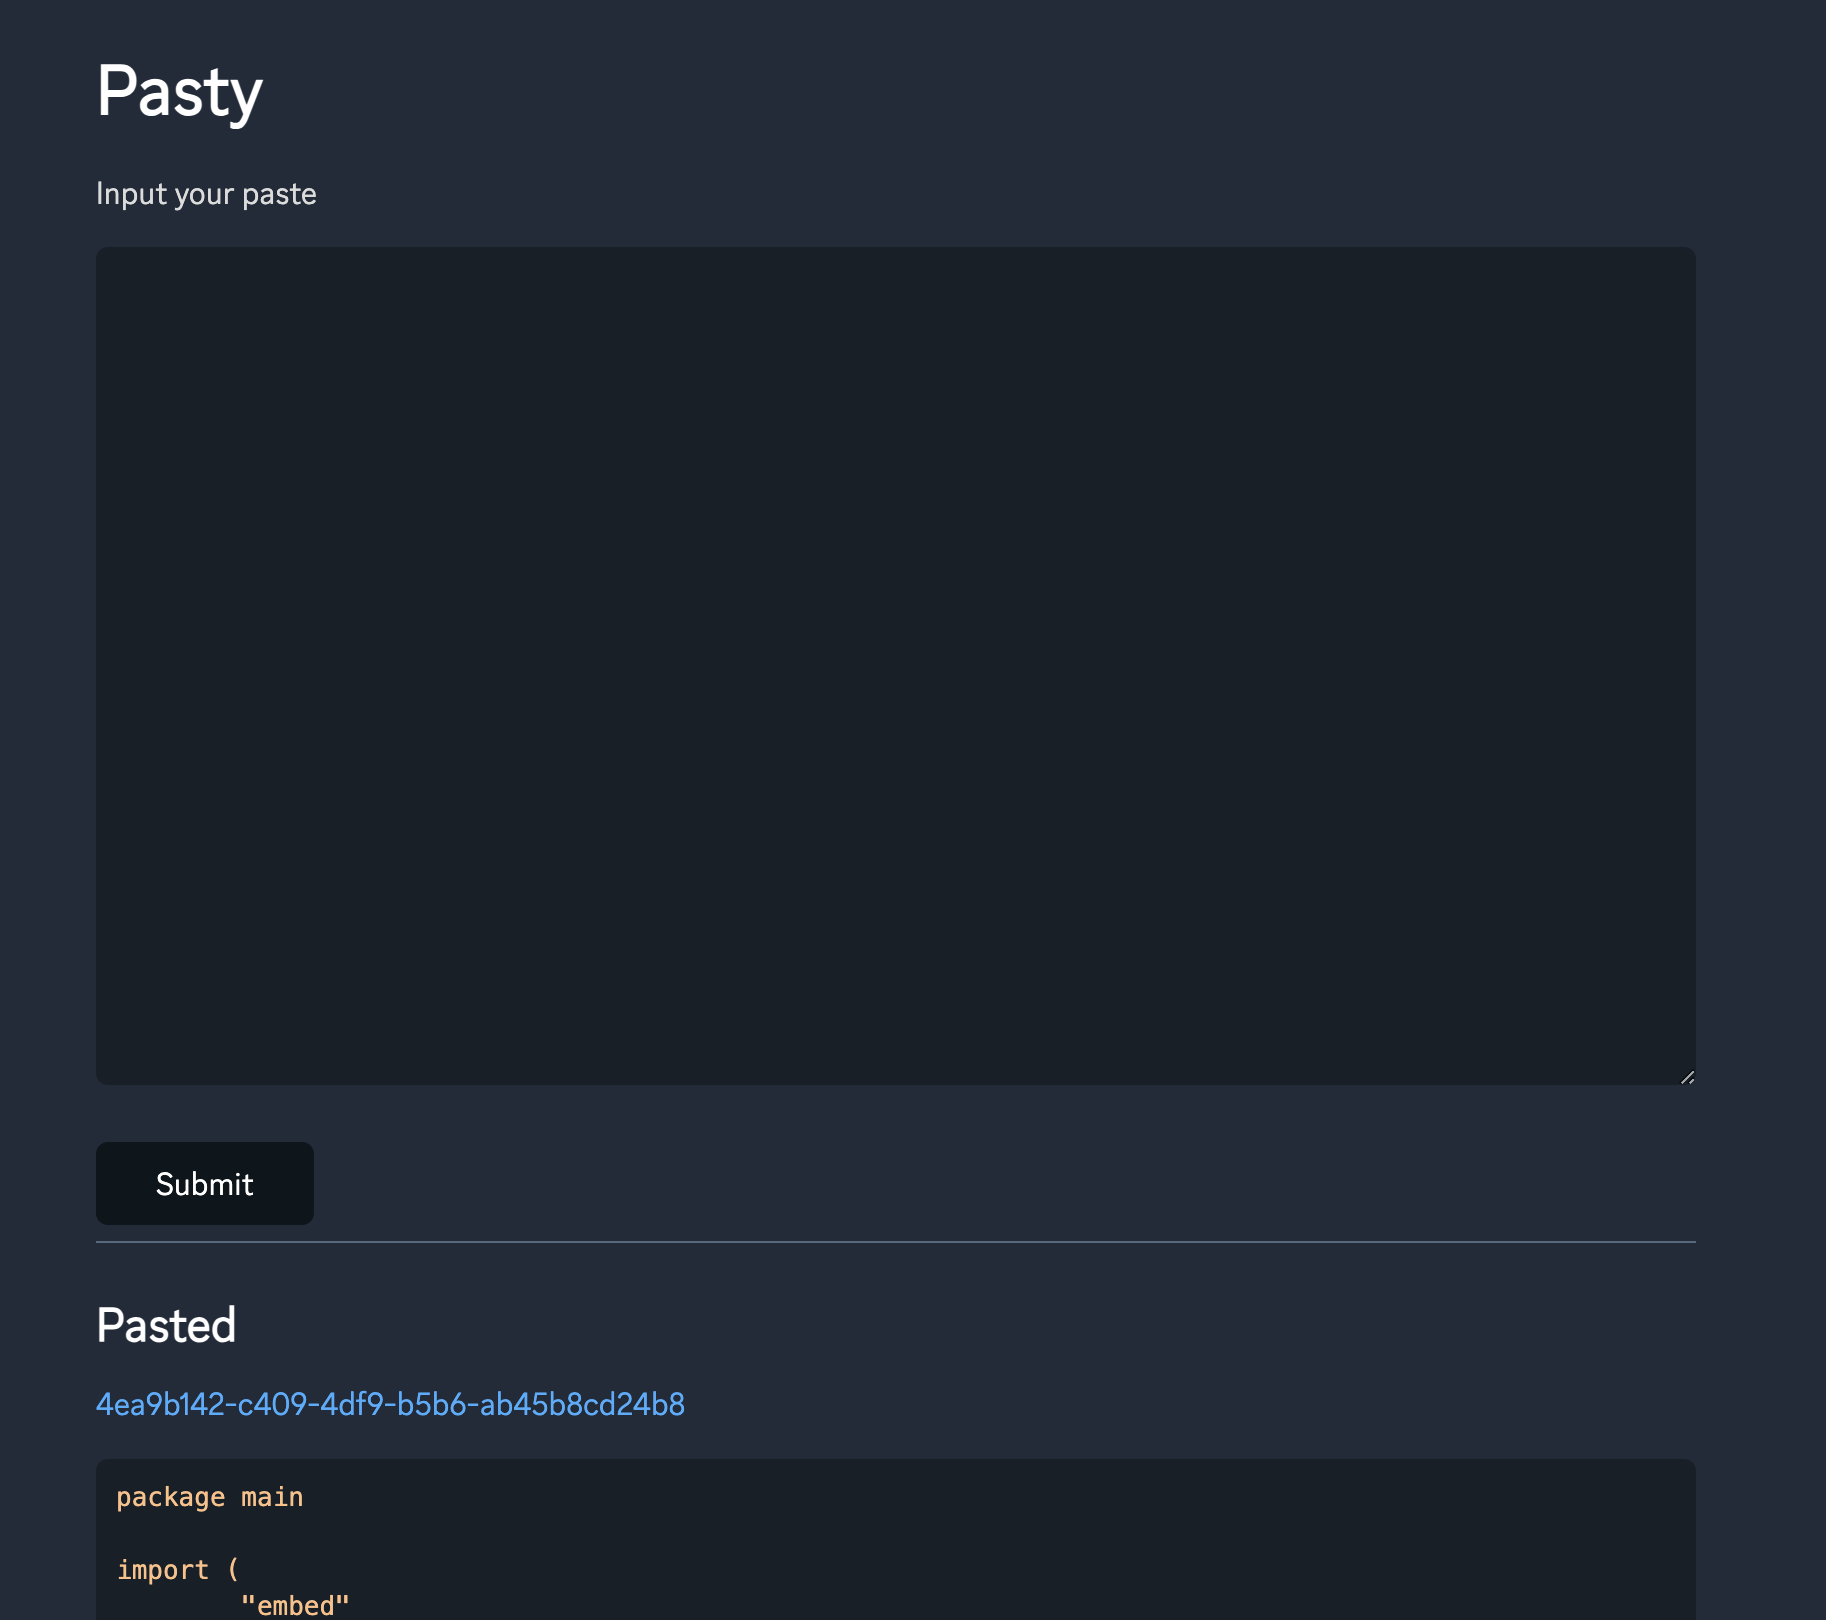
Looks pretty good!
It's use
gg fontasfont-family.
You also can add a favicon and add a copy button at paste page.
Using Javascript to copy the content.
<!DOCTYPE html>
<html>
  <head>
    <title>Pasty</title>
    <link
      rel="stylesheet"
      href="https://cdn.jsdelivr.net/npm/water.css@2/out/water.css"
    />
    <link rel="shortcut icon" type="image/x-icon" href="favicon.ico" />
    <style>
      .code-container {
        position: relative;
      }

      .code-container .copy-button {
        position: absolute;
        top: 0;
        right: 0;
        padding: 5px;
        border: none;
        cursor: pointer;
      }
    </style>
    <script>
      async function copyCode(block, button) {
        let code = block.querySelector("code");
        let text = code.innerText;

        await navigator.clipboard.writeText(text);

        // visual feedback that task is completed
        button.innerText = "Code Copied";

        setTimeout(() => {
          button.innerText = copyButtonLabel;
        }, 700);
      }
    </script>
  </head>

  <body>
    <a href="/">Home</a>
    <div class="code-container">
      <h2>{{.UID}}</h2>
      <button class="copy-button" onclick="copyCode(this.parentElement, this)">
        Copy
      </button>
      <pre><code>{{.Content}}</code></pre>
      <p>{{.CreatedAt}}</p>
      <form method="POST">
        <input type="submit" value="Delete" />
      </form>
    </div>
  </body>
</html>
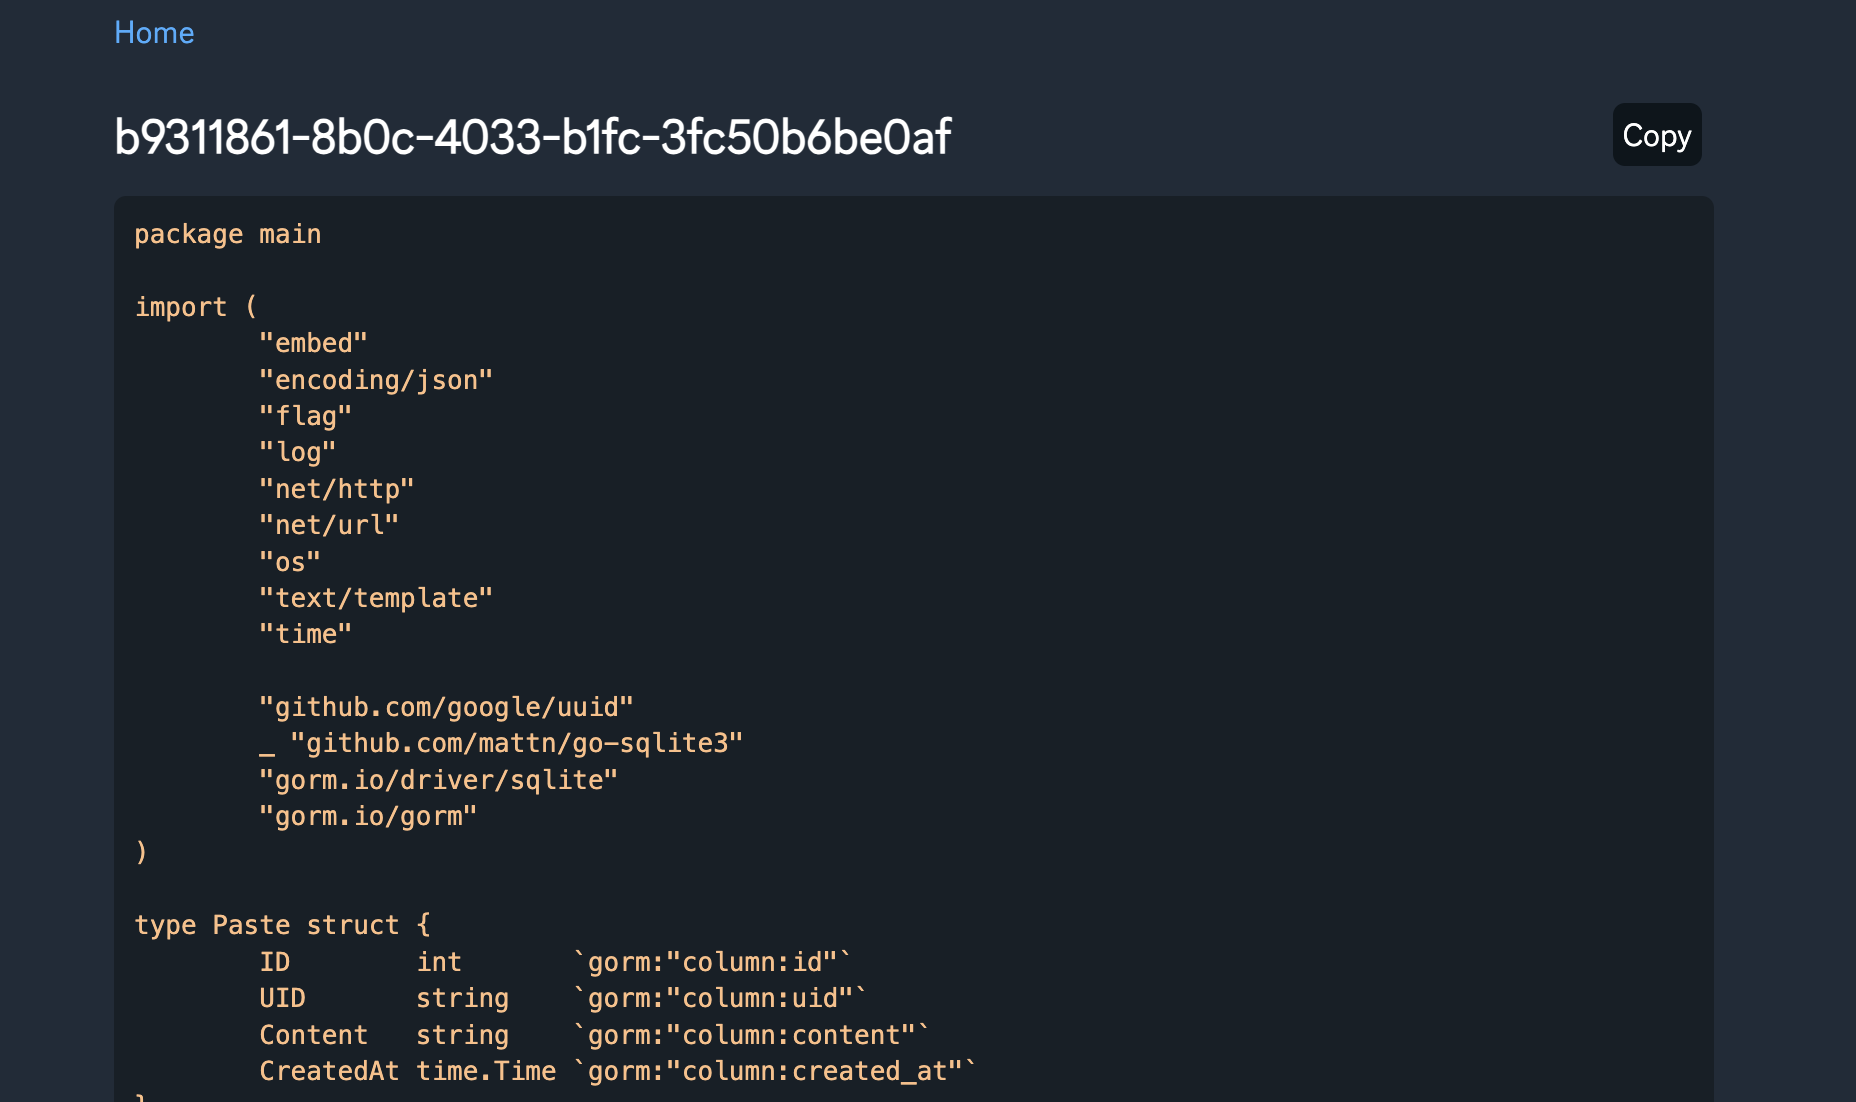
This will have a copy button at paste content right top.

It's looks also pretty good!
At the last step, we will to add Turnstile.
Turnstile
Turnstile is Cloudflare’s smart CAPTCHA alternative. It can be embedded into any website without sending traffic through Cloudflare and works without showing visitors a CAPTCHA. Cloudflare
For my wrote tools, it's always have not security views. We can use CAPTCHA to protect our forms.
HTML script
Add Turnstile also very easy, at first, you need to add Turnstile script to your website.
<script src="https://challenges.cloudflare.com/turnstile/v0/api.js" async defer></script>
Then you can add cf-turnstile to form.
<div class="cf-turnstile" data-sitekey="YOUR_TURNSTILE_SITE_KEY"></div>
I just add Turnstile to index.html page submit form.
This is the result
<!DOCTYPE html>
<html>
<head>
    <title>Pasty</title>
    <link rel="stylesheet" href="https://cdn.jsdelivr.net/npm/water.css@2/out/water.css">
    <script src="https://challenges.cloudflare.com/turnstile/v0/api.js" async defer></script>
</head>
<body>
    <h1>Pasty</h1>
    <p>Input your paste</p>
    <form method="POST">
        <textarea name="content" required rows="30"></textarea>
        <br/>
        <input type="submit" value="Submit">
        <div class="cf-turnstile" data-sitekey="{{.CFTurnstileSiteKey}}" data-callback="turnstileCompleted"></div>
    </form>
    <hr/>
    <h2>Pasted</h2>
    {{range .Pastes}}
        <div>
            <a href="/paste/{{.UID}}">{{.UID}}</a>
            <pre><code>{{truncate .Content 200}}</code></pre>
        </div>
    {{end}}
</body>
</html>
You also need do something configuration for Turnstile.
- Add site
- Copy site key, secret key
You can find this at cloudflare's documentation.
Server handler
The new form which we add Turnstile will send cf-turnstile-response, you can use this to validate the user.
This is the sample code.
The validation request param
CF-Connecting-IPis optional. if you are using Cloudflare DNS, you can add this param.
CF-Connecting-IP provides the client IP address connecting to Cloudflare to the origin web server. This header will only be sent on the traffic from Cloudflare’s edge to your origin web server.
Cloudflare - HTTP request headers
func cfValidate(r *http.Request) bool {
	token := r.Form.Get("cf-turnstile-response")
	ip := r.Header.Get("CF-Connecting-IP")

	if token == "" || ip == "" {
		return false
	}

	form := url.Values{}
	form.Set("secret", CFTurnstileSecret)
	form.Set("response", token)
	form.Set("remoteip", ip)
	idempotencyKey := uuid.New().String()
	form.Set("idempotency_key", idempotencyKey)

	resp, err := http.PostForm(CFTurnstileURL, form)
	if err != nil {
		return false
	}

	type CFTurnstileResponse struct {
		Success bool `json:"success"`
	}

	cfresp := CFTurnstileResponse{}

	err = json.NewDecoder(resp.Body).Decode(&cfresp)

	return err != nil || cfresp.Success
}
The result will contain success, can judge it by self.
Look the site
After add Turnstile, there will have a Turnstile validation at the submit button bottom.

Ok, now we have protect our form with Turnstile.
GitHub OAuth
After add Turnstile, I thought the site also too open, anyone can view it.
So we can add some Authentication feature, example to use OAuth.
OAuth had many client, Google, GitHub, etc. I use GitHub there.
These is the GitHub OAuth flow
- Request
GitHubIdentity API - User accept request, redirect to
CallbackURL withCode. - At
Callbacklogic, requestGitHubAccess Token API withCode. - Use
Access Tokento requestGitHubUser API.
You first need to get Client ID and Client Secret. you can create a application at https://github.com/settings/applications/new
API
Base on the OAuth flow, let's design the APIs.
At first, we don't want user goto login flow at every time. So we need to store the Login Status. at where? at the Cookie.
So we will store Login Status in Cookie. then once the user view we will check the Login Status. if it's not Login, we will redirect he goto login flow.
So we have a API to trigger login flow, we also need a Callback API to get Access Token and User.
var GHRedirectURL =  fmt.Sprintf("https://github.com/login/oauth/authorize?client_id=%s&redirect_uri=%s", GHClientID, fmt.Sprintf("%s/login/callback", SiteURL))
...
http.HandleFunc("/login", func(w http.ResponseWriter, r *http.Request) {
	http.Redirect(w, r, GHRedirectURL, http.StatusSeeOther)
})

http.HandleFunc("/login/callback", func(w http.ResponseWriter, r *http.Request) {
	code := r.URL.Query().Get("code")
	ak, sk, expiresIn := getGithubAccessToken(code, "")
	if ak == "" {
		fmt.Sprintln(w, "<html><body><h1>Failed to login</h1></body></html>")
		return
	}

	setCookieSession(w, "s", ak, sk, expiresIn)

	http.Redirect(w, r, "/", http.StatusSeeOther)
})
Refresh logic
GitHub OAuth can use refresh token to refresh Access Token, so we can use refresh token to get new Access Token when Access Token expired.
All these information will be stored in Cookie.
Cookie value should be encrypted, need to implement encryption and decryption.
This is my all implementation
Session struct.
type Session struct {
	AK     string `json:"ak"`
	RK     string `json:"rk"`
	Expire int    `json:"ak_expire"`
}
Use Code or Refresh Token to get Access Token, Refresh Token, Expires In.
func getGithubAccessToken(code, rk string) (string, string, int) {
	params := map[string]string{"client_id": GHClientID, "client_secret": GHSecret}
	if rk != "" {
		params["refresh_token"] = rk
		params["grant_type"] = "refresh_token"
	} else {
		params["code"] = code
	}

	rbody, _ := json.Marshal(params)

	req, err := http.NewRequest("POST", "https://github.com/login/oauth/access_token", bytes.NewBuffer(rbody))
	if err != nil {
		log.Printf("Error: %s\n", err)
		return "", "", 0
	}

	req.Header.Set("Content-Type", "application/json")
	req.Header.Set("Accept", "application/json")

	resp, resperr := http.DefaultClient.Do(req)
	if resperr != nil {
		log.Printf("Error: %s\n", resperr)
		return "", "", 0
	}

	type githubAKResp struct {
		AccessToken  string `json:"access_token"`
		ExpiresIn    int    `json:"expires_in"`
		RefreshToken string `json:"refresh_token"`
		Scope        string `json:"scope"`
	}

	var ghresp githubAKResp

	err = json.NewDecoder(resp.Body).Decode(&ghresp)
	if err != nil {
		log.Printf("Error: %s\n", err)
		return "", "", 0
	}

	log.Printf("Github: %+v", ghresp)
	return ghresp.AccessToken, ghresp.RefreshToken, ghresp.ExpiresIn
}
checkRefreshGHStatus will check Login Status, if there not have Session, return false, goto login flow.
if the Access Token expired, will use Refresh Token to get new Access Token.
func checkRefreshGHStatus(w http.ResponseWriter, r *http.Request) bool {
	session := getCookieSession(r)
	if session == nil {
		log.Printf("session is nil")
		return false
	}

	log.Printf("session: %+v", session)

	if time.Now().Unix() > int64(session.Expire) {
		log.Printf("now: %d, expire: %d", time.Now().Unix(), session.Expire)
		if session.RK == "" {
			return false
		}
		ak, sk, expiresIn := getGithubAccessToken("", session.RK)
		if ak == "" {
			return false
		}

		setCookieSession(w, "s", ak, sk, expiresIn)
	}

	if getGithubData(session.AK) == "" {
		return false
	}

	return true
}
Encrypt cookie value
Cookie value should be encrypted, need to implement encryption and decryption. can use aes to encrypt and base64 to encode.
func encryptData(data []byte) (string, error) {
	block, err := aes.NewCipher(CipherKey)
	if err != nil {
		return "", fmt.Errorf("could not create new cipher: %v", err)
	}

	cipherText := make([]byte, aes.BlockSize+len(data))
	iv := cipherText[:aes.BlockSize]
	if _, err = io.ReadFull(rand.Reader, iv); err != nil {
		return "", fmt.Errorf("could not encrypt: %v", err)
	}

	stream := cipher.NewCFBEncrypter(block, iv)
	stream.XORKeyStream(cipherText[aes.BlockSize:], data)

	return base64.StdEncoding.EncodeToString(cipherText), nil
}

func decryptStr(str string) ([]byte, error) {
	cipherText, err := base64.StdEncoding.DecodeString(str)
	if err != nil {
		return nil, fmt.Errorf("could not base64 decode: %v", err)
	}

	block, err := aes.NewCipher(CipherKey)
	if err != nil {
		return nil, fmt.Errorf("could not create new cipher: %v", err)
	}

	if len(cipherText) < aes.BlockSize {
		return nil, fmt.Errorf("invalid ciphertext block size")
	}

	iv := cipherText[:aes.BlockSize]
	cipherText = cipherText[aes.BlockSize:]

	stream := cipher.NewCFBDecrypter(block, iv)
	stream.XORKeyStream(cipherText, cipherText)

	return cipherText, nil
}
Conclusion
When a user concept exists,it may be necessary to add
Userfunctionality. Add theUserfield to thePastestructure and form and perform aCRUDwith the logged in user.((I left this part unimplemented to be lazy :p)
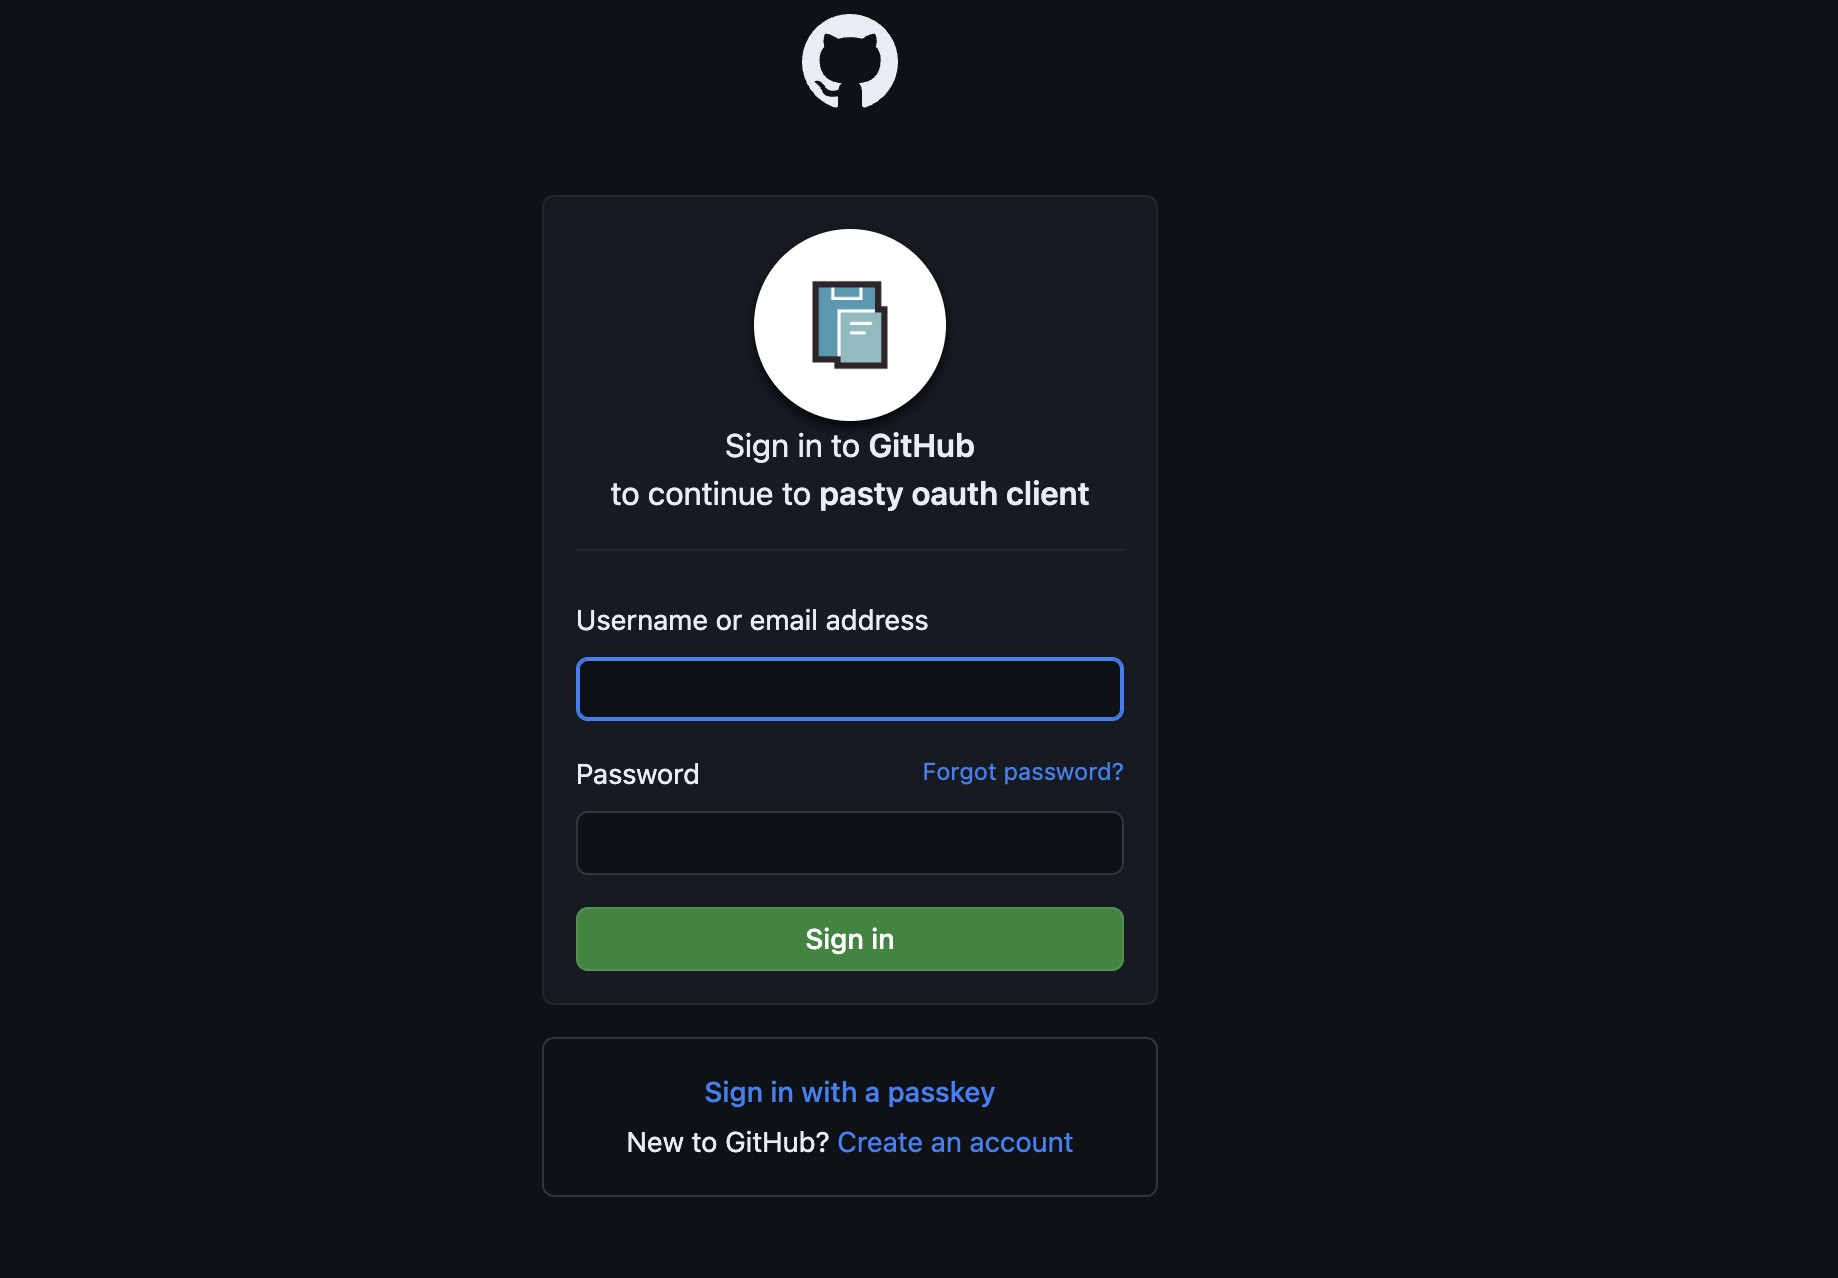
After setting GitHub application, you can see this page when first view index page.

Done
The all work is done, you can find the code at github.com/abcdlsj/pasty.
Thanks for reading.